# venv搭建不同版本的frida环境
## pyenv搭建不同python环境
首先得先有个python环境,下载pyenv:
```
pip install pyenv-win -i https://pypi.tuna.tsinghua.edu.cn/simple --target C:/.pyenv
```
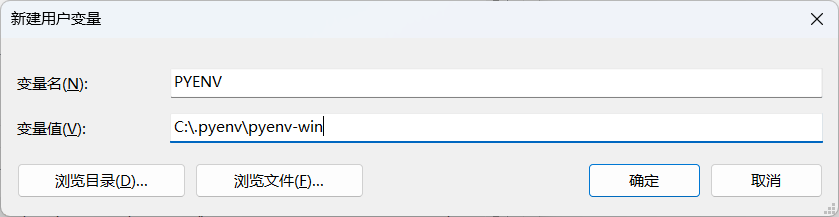
新增用户变量:
配置环境变量:
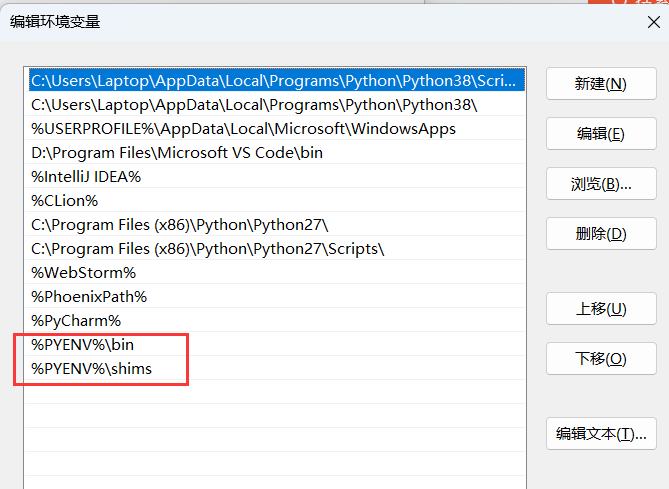 ```
%PYENV%\bin
%PYENV%\shims
```
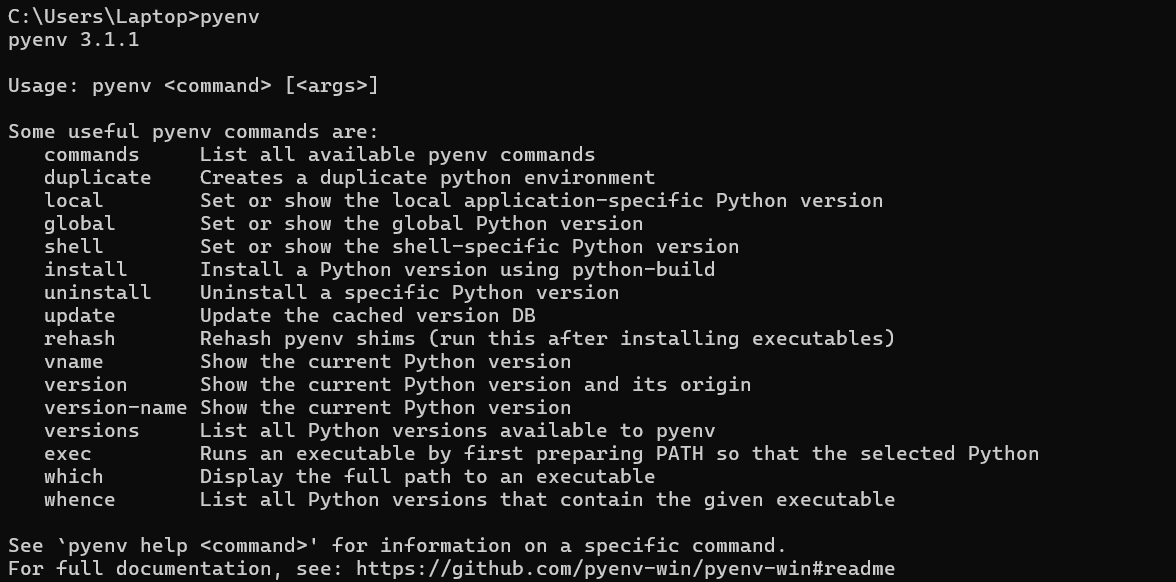
cmd输入:`pyenv`测试是否成功安装
```
%PYENV%\bin
%PYENV%\shims
```
cmd输入:`pyenv`测试是否成功安装
 查看有哪些python版本能安装:`pyenv install --list`
挂代理(我用的是clash 7890端口):
```
set http_proxy=http://127.0.0.1:7890
set https_proxy=http://127.0.0.1:7890
```
下载python版本:
```
pyenv install 3.10.5
```
## venv搭建同python版本下不同版本的frida环境
**`venv`** 模块支持使用自己的站点目录创建轻量级“虚拟环境”,可选择与系统站点目录隔离。每个虚拟环境都有自己的 python 二进制文件(与用于创建此环境的二进制文件的版本相匹配),并且可以在其站点目录中拥有自己独立的已安装 python 软件包集
### 使用venv搭建frida_15.0.10版本环境
创建虚拟环境
使用以下命令创建文件夹名为`frida_15.0.10_x86`的虚拟环境:
```
python -m venv D:\Security\Frida\frida_15.0.10_x86
```
进入虚拟环境:
```
D:\Security\Frida\frida_15.0.10_x86>cd Scripts
D:\Security\Frida\frida_15.0.10_x86\Scripts>activate.bat
(frida_15.0.10_x86) D:\Security\Frida\frida_15.0.10_x86\Scripts>
```
在当前虚拟环境安装`firda15.0.10`
```
pip install frida==15.0.10 -i https://pypi.tuna.tsinghua.edu.cn/simple
```
安装对应的`frida-tool`
```
pip install frida-tools==10.2.0 -i https://pypi.tuna.tsinghua.edu.cn/simple
```
查看有哪些python版本能安装:`pyenv install --list`
挂代理(我用的是clash 7890端口):
```
set http_proxy=http://127.0.0.1:7890
set https_proxy=http://127.0.0.1:7890
```
下载python版本:
```
pyenv install 3.10.5
```
## venv搭建同python版本下不同版本的frida环境
**`venv`** 模块支持使用自己的站点目录创建轻量级“虚拟环境”,可选择与系统站点目录隔离。每个虚拟环境都有自己的 python 二进制文件(与用于创建此环境的二进制文件的版本相匹配),并且可以在其站点目录中拥有自己独立的已安装 python 软件包集
### 使用venv搭建frida_15.0.10版本环境
创建虚拟环境
使用以下命令创建文件夹名为`frida_15.0.10_x86`的虚拟环境:
```
python -m venv D:\Security\Frida\frida_15.0.10_x86
```
进入虚拟环境:
```
D:\Security\Frida\frida_15.0.10_x86>cd Scripts
D:\Security\Frida\frida_15.0.10_x86\Scripts>activate.bat
(frida_15.0.10_x86) D:\Security\Frida\frida_15.0.10_x86\Scripts>
```
在当前虚拟环境安装`firda15.0.10`
```
pip install frida==15.0.10 -i https://pypi.tuna.tsinghua.edu.cn/simple
```
安装对应的`frida-tool`
```
pip install frida-tools==10.2.0 -i https://pypi.tuna.tsinghua.edu.cn/simple
```