# FridaHook环境搭建
# Frida Hook 环境搭建
## 一、下载安装 Python3.8
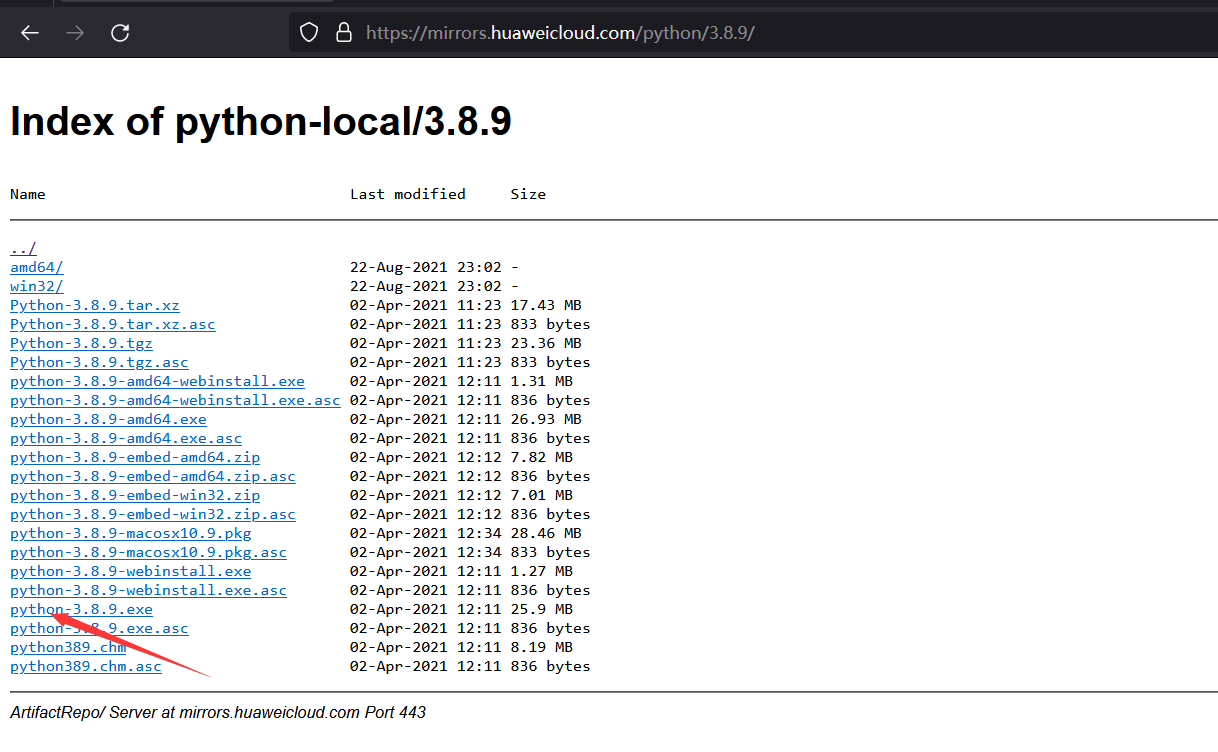
在这个镜像站随便下载一个3.8的python
[Index of python-local (huaweicloud.com)](https://mirrors.huaweicloud.com/python/)
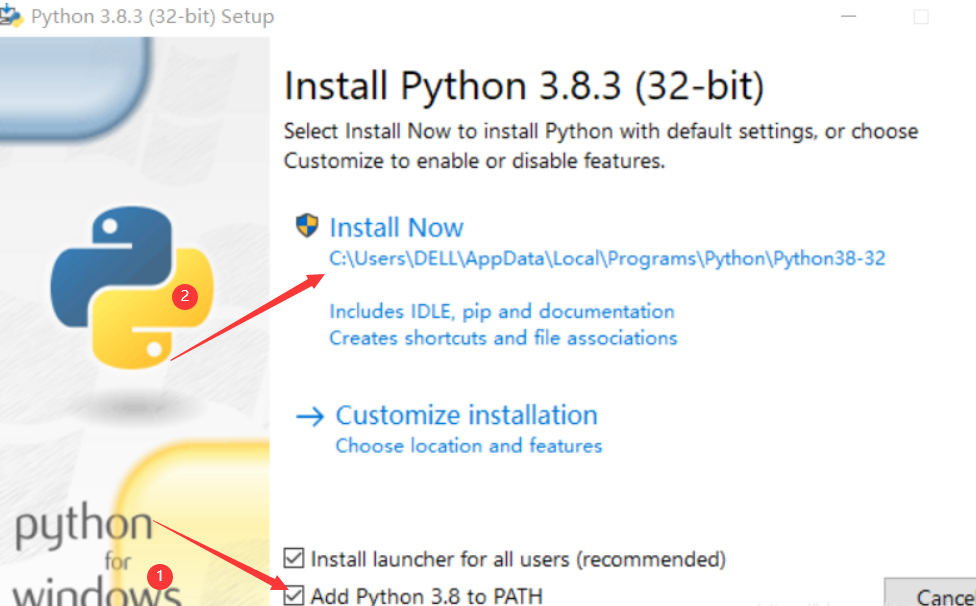
 记得勾选“Add Python 3.8 to PATH”
 WIN+R,输入cmd,在打开的命令行窗口里输入:
```
python -V
```
如果没报错说明安装上了
## 二、frida 的安装
frida在兼容性这一块不够好
frida的版本选择(建议):
frida12.3.6 Android5-6 Python3.7
frida12.8.0 Android7-8 Python3.8
frida14+ Android9+ Python3.8
frida15+ Android12 Python3.8+
> 我电脑上的雷电模拟器是安卓9为,选择frida 14.2.18版本,建议和我一样安装一个雷电模拟器安卓9版本,后面就不用下载adb了
安装14.2.18版本的frida:
```shell
pip install frida==14.2.18 -i https://pypi.tuna.tsinghua.edu.cn/simple
```
安装14.2.18版本的frida所对应的frida-tools:
打开https://github.com/frida/frida/releases/tag/14.2.18(这里的14.2.18就是要安装的frida版本)
划到下面看对应的frida-tools的版本:
WIN+R,输入cmd,在打开的命令行窗口里输入:
```
python -V
```
如果没报错说明安装上了
## 二、frida 的安装
frida在兼容性这一块不够好
frida的版本选择(建议):
frida12.3.6 Android5-6 Python3.7
frida12.8.0 Android7-8 Python3.8
frida14+ Android9+ Python3.8
frida15+ Android12 Python3.8+
> 我电脑上的雷电模拟器是安卓9为,选择frida 14.2.18版本,建议和我一样安装一个雷电模拟器安卓9版本,后面就不用下载adb了
安装14.2.18版本的frida:
```shell
pip install frida==14.2.18 -i https://pypi.tuna.tsinghua.edu.cn/simple
```
安装14.2.18版本的frida所对应的frida-tools:
打开https://github.com/frida/frida/releases/tag/14.2.18(这里的14.2.18就是要安装的frida版本)
划到下面看对应的frida-tools的版本:
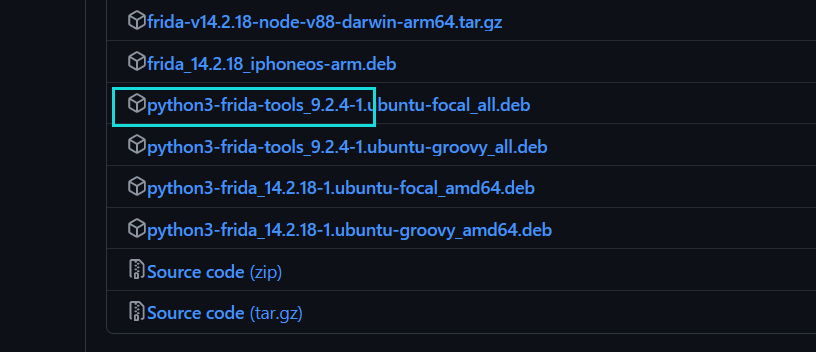 ```shell
pip install frida-tools==9.2.4 -i https://pypi.tuna.tsinghua.edu.cn/simple
```
安装后输入:`frida`看看是否成功装上
## 三、WebStorm 与 NodeJS 的安装
安装 WebStorm(自行搜索WebStorm破解版安装教程)
新建一个项目目录
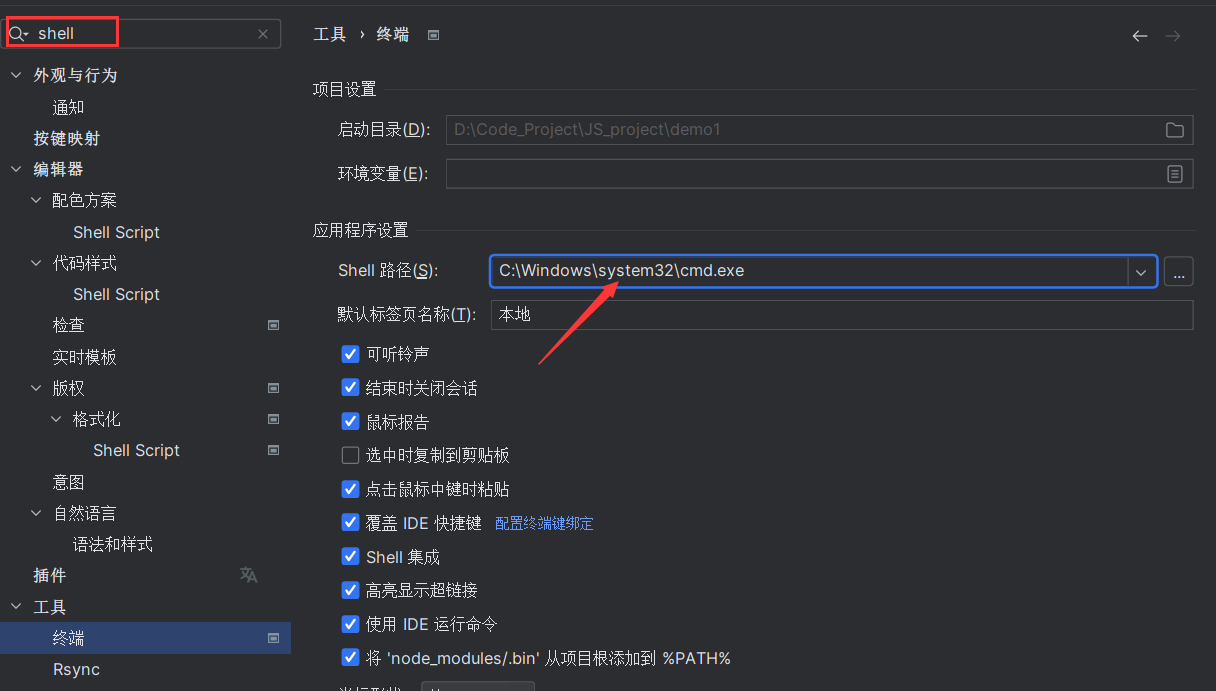
WebStorm 设置里修改终端:
## 四、代码提示的配置 (局部)
4.1、配置 npm 环境变量:
找到 npm 路径
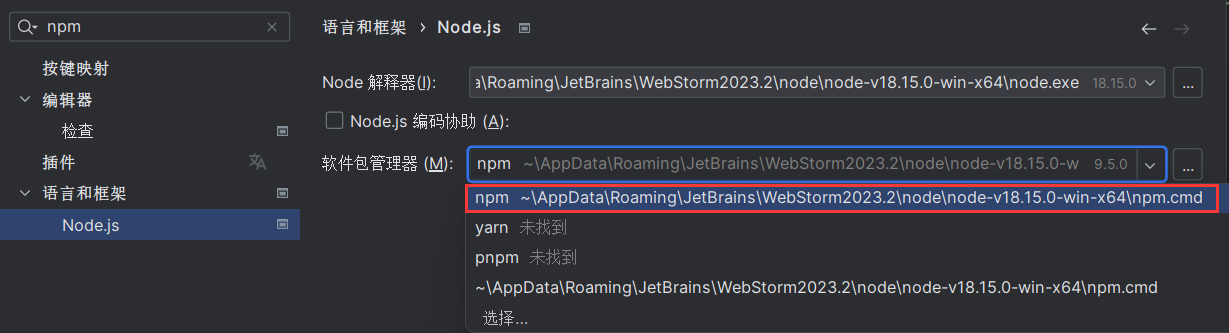
添加环境变量

重启电脑
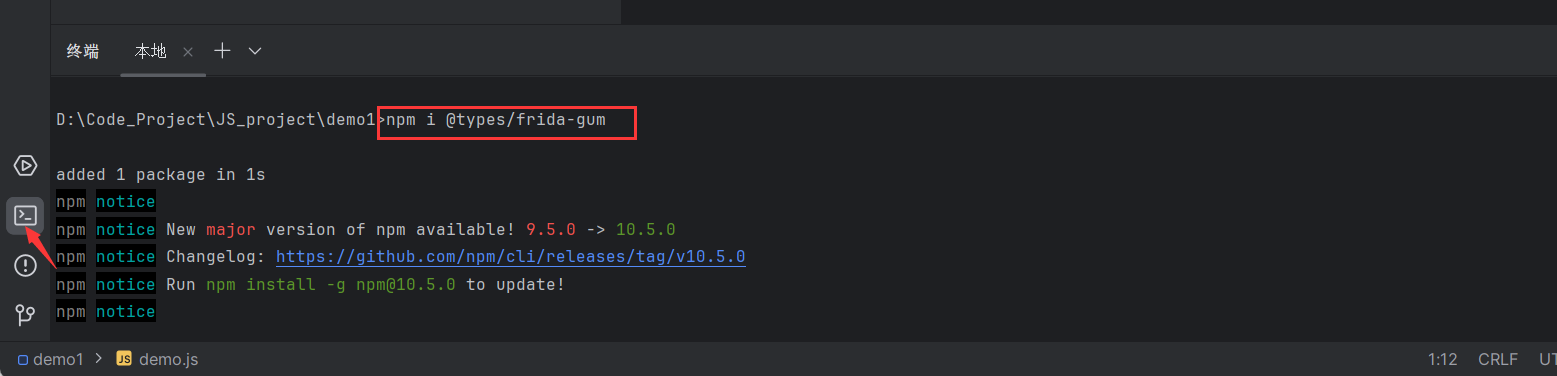
4.2、配置 frida 局部代码提示
打开项目目录下的终端:
```shell
npm i @types/frida-gum
```
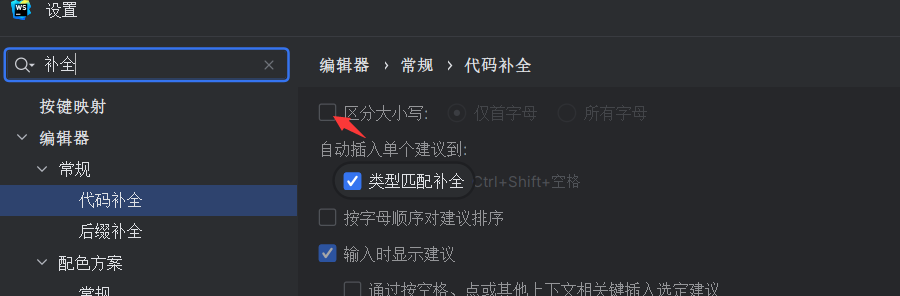
4.3、代码补全忽略大小写:
## 五、frida-server 的配置
5.1、下载安装 frida-server
下载地址:https://github.com/frida/frida/releases/tag/14.2.18(14.2.18是frida版本号)
打开模拟器/手机usb连接电脑,在模拟器/手机设置里开启开发者模式、开启usb调试
查询模拟器/真机架构,打开cmd:
```cmd
adb shell getprop ro.product.cpu.abi
```

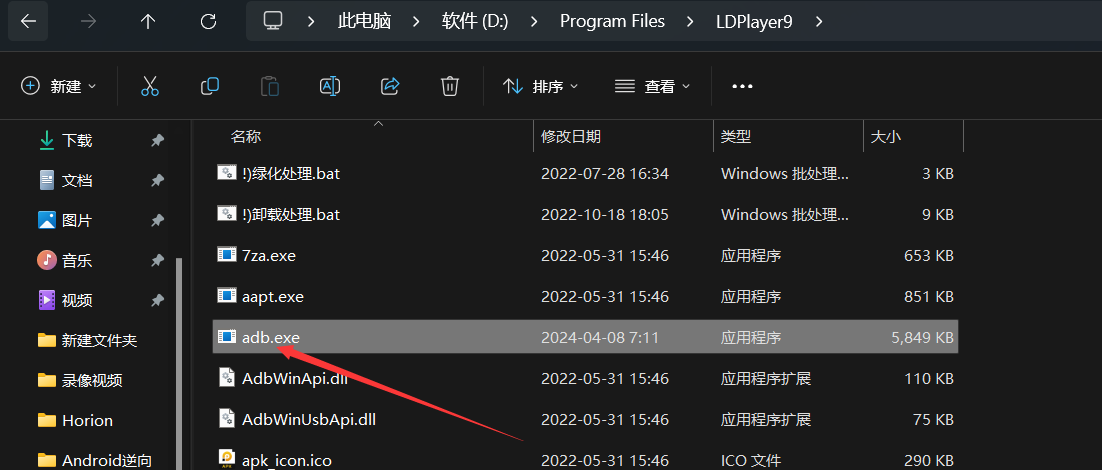
> 如果找不到adb这命令,在雷电模拟器安装目录下有adb,复制adb所在路径例如:`D:\Program Files\LDPlayer9`到环境变量中
>
>
```shell
pip install frida-tools==9.2.4 -i https://pypi.tuna.tsinghua.edu.cn/simple
```
安装后输入:`frida`看看是否成功装上
## 三、WebStorm 与 NodeJS 的安装
安装 WebStorm(自行搜索WebStorm破解版安装教程)
新建一个项目目录
WebStorm 设置里修改终端:

## 四、代码提示的配置 (局部)
4.1、配置 npm 环境变量:
找到 npm 路径

添加环境变量

重启电脑
4.2、配置 frida 局部代码提示
打开项目目录下的终端:
```shell
npm i @types/frida-gum
```

4.3、代码补全忽略大小写:

## 五、frida-server 的配置
5.1、下载安装 frida-server
下载地址:https://github.com/frida/frida/releases/tag/14.2.18(14.2.18是frida版本号)
打开模拟器/手机usb连接电脑,在模拟器/手机设置里开启开发者模式、开启usb调试
查询模拟器/真机架构,打开cmd:
```cmd
adb shell getprop ro.product.cpu.abi
```

> 如果找不到adb这命令,在雷电模拟器安装目录下有adb,复制adb所在路径例如:`D:\Program Files\LDPlayer9`到环境变量中
>
>  下载 Android 端的x86_64架构(上面那条命令查出来的)
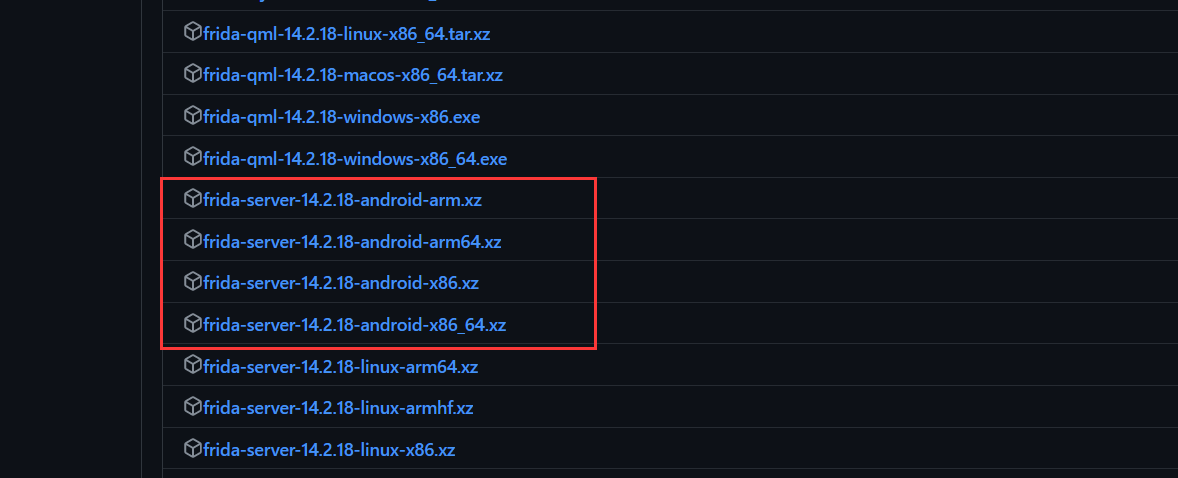
下载完后先解压,把 frida-server 推送到模拟器/真机 (记得先解压)
```shell
adb push frida-server-14.2.18-android-x86_64 /data/local/tmp/fs
```
到这里环境的部署就结束了
5.2、运行 frida-server
```shell
adb shell #进入adb shell
su #切换管理员
cd /data/local/tmp #到frida-server所在目录
chmod 777 fs #赋予执行权限
./fs #运行frida-server
```
5.3、开启端口转发
```shell
adb forward tcp:27042 tcp:27042
```
5.4、运行 frida 脚本
```shell
frida -U -F -l demo.js
```
下载 Android 端的x86_64架构(上面那条命令查出来的)

下载完后先解压,把 frida-server 推送到模拟器/真机 (记得先解压)
```shell
adb push frida-server-14.2.18-android-x86_64 /data/local/tmp/fs
```
到这里环境的部署就结束了
5.2、运行 frida-server
```shell
adb shell #进入adb shell
su #切换管理员
cd /data/local/tmp #到frida-server所在目录
chmod 777 fs #赋予执行权限
./fs #运行frida-server
```
5.3、开启端口转发
```shell
adb forward tcp:27042 tcp:27042
```
5.4、运行 frida 脚本
```shell
frida -U -F -l demo.js
```